

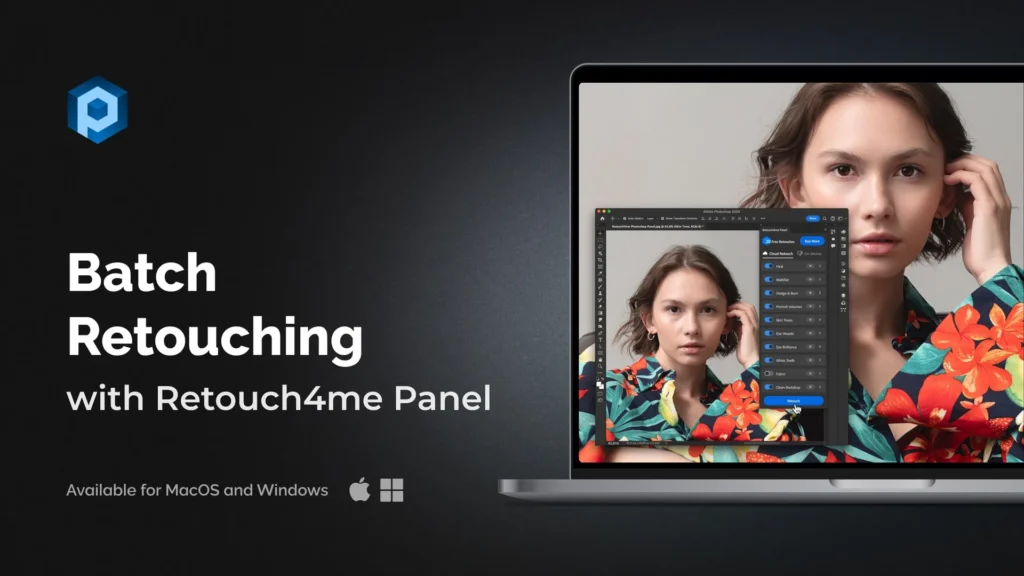
Retouch4me Review

Retouch4me is a set of AI-powered software tools for photo retouching. These plugins are designed to simplify the image editing process by automating various stages of retouching, such as skin enhancement, defect removal, texture improvement, and other features.
You know the feeling. You spend $300 on a skincare routine, another hour getting the lighting perfect, and you snap the photo. You zoom in—a few pimples, some uneven texture. Normal stuff.
So you open your “AI Editor” app. You slide the “Smooth” bar to 10%. And suddenly… you look like a wax figure from a horror movie. The pores are gone. The skin texture is obliterated. You have entered the “Uncanny Valley.”
In 2026, we are all tired of the “Fake AI Look.” Whether you are documenting your skin journey for MithVibe’s Biohacking protocols or just need a professional LinkedIn headshot, texture is trust. If people can’t see your skin, they don’t trust you.
I’ve spent the last month testing Retouch4me, a suite of AI plugins that claims to be the “Anti-Filter.” It doesn’t blur your face; it fixes it. Here is my honest, frustrated, and finally impressed review.
How to sign up for Retouch4me?
To sign up for Retouch4me, visit the official registration page and enter your email, first name, and last name. You can also use social login via Google, Apple, or Facebook. Once registered, you can access your dashboard to download plugins, manage licenses, and purchase professional retouching credits for cloud processing.
- Visit the Website: Go to the official Retouch4me registration page.
- Enter Details: Provide your email address and full name.
- Choose Login Method: Select a password or use Google/Apple for faster access.
- Confirm Account: Verify your email to activate your user dashboard.
- Access Plugins: Navigate to the “Photo Retouching” tab to choose your tools.
The Real Problem: Why Most AI Sucks
Most tools (even Photoshop’s own Neural Filters) use a “blur” technique. They see a pimple, and they just smear the pixels around it. It’s like painting over a crack in the wall with a thick coat of gloss—it looks smooth, but it looks wrong.
As we discussed in The Rise of Agentic AI, the next generation of AI isn’t about replacing reality; it’s about fixing it intelligently.
Retouch4me works differently. It uses Frequency Separation (a pro technique usually reserved for Vogue retouchers). It separates your photo into two layers:
- Texture (High Frequency): Pores, hairs, fine lines.
- Color (Low Frequency): Skin tone, shadows, redness.
It fixes the bad stuff (pimples) while leaving the good stuff (pores) 100% alone.

The “Big 3” Plugins I Actually Use Daily
I tested the whole suite, but you don’t need to buy everything. These are the three that actually saved my workflow.
1. Retouch4me Heal (The “Dermatologist”)
This is the one you need. Period. I threw a RAW photo at it with visible acne and scarring. Instead of blurring the cheek, the AI identified only the pimples. It removed them but kept the skin pattern underneath.
- Verdict: It looks like I just have incredible genetics, not like I used an app.
- Best for: Anyone doing close-up portraits or beauty content.
- [Check out the Heal Plugin here] (Use code: MITHVIBE20 for 20% off)

How to use the Retouch4me Heal plugin?
To use the Retouch4me Heal plugin, open your portrait in Photoshop and navigate to the Filter menu. This AI-powered tool automatically detects skin blemishes, acne, and pores without destroying natural texture. It is the most efficient way to achieve professional-grade skin healing while maintaining 100% authenticity in your photos.
- Open Image: Load your portrait into Adobe Photoshop.
- Launch Plugin: Go to Filter > Retouch4me > Heal.
- Adjust Sensitivity: Use the slider at the top to set the blemish detection level (80-90% is recommended).
- Preview: Toggle the “Before/After” button to ensure skin texture is preserved.
- Apply: Click the Apply button in the bottom right to return to Photoshop.
The “Truth in Pixels” Comparison Table
| Feature | Retouch4me (The Pro Choice) | Free AI Apps (Lensa, Canva, etc.) |
| Skin Texture | Pro Texture: Uses “Frequency Separation” to keep pores and unique skin details 100% intact. | Blurry Skin: Uses “Gaussian Blur” which smears pixels, making faces look like plastic or wax. |
| Privacy & Security | High Privacy: Works 100% Offline. Your photos never leave your hard drive. No cloud leaks. | Low Privacy: Photos are uploaded to servers. Data is often used to “train” their AI models. |
| File Quality | Lossless: Works with RAW files and 16-bit TIFFs in Photoshop for professional printing. | Compressed: Most free apps downscale your photo to a “Social Media” size (72ppi), ruining it for print. |
| Price Model | Buy It For Life: One-time purchase. No monthly “vampire” subscriptions. | Hidden Costs: High-res exports usually require “Credits” or a monthly fee. |
| Workflow | Batch Pro: Process 1,000 photos in one click while you grab a coffee. | One-by-One: Manual, slow, and requires a constant internet connection. |
2. Retouch4me Dodge & Burn (The “Lighting Crew”)
You know how movie stars always look “sculpted”? That’s usually Dodge & Burn—lightening the highs and darkening the shadows. Doing this manually takes me about 45 minutes per photo.
- The AI Result: It took 12 seconds. It smoothed out the transition from my cheekbone to my jawline without touching the texture.
- The “MithVibe” Score: 10/10 for efficiency. This is a game-changer for Overcoming the AI Skills Gap in 2026 because it automates a skill that usually takes years to learn.
- Check it out here–> Retouch4me Dodge & Burn
How to use Retouch4me Dodge & Burn?
Using Retouch4me Dodge & Burn involves applying the plugin as a filter to smooth skin transitions and remove under-eye bags. Unlike manual editing, this AI tool performs high-end “sculpting” by adjusting light and shadows automatically. It is the fastest method to achieve a magazine-quality look while keeping original skin pores intact.
- Prepare Layer: Select your image layer in Photoshop (or create a duplicate).
- Open Filter: Select Filter > Retouch4me > Dodge & Burn.
- Set Blend Mode: Enable the “Soft Light Layer” option for a non-destructive workflow.
- Fine-Tune: Adjust the Blend slider to control the intensity of the smoothing effect.
- Finalize: Click Apply to generate the retouching layer in your workspace.
3. Retouch4me Clean Backdrop (The “Studio Saver”)
If you shoot videos or photos at home, you know the struggle of a dirty wall or a wrinkled green screen. This plugin detects “dirt” that isn’t supposed to be there and wipes it. It turned my messy living room wall into a clean, infinite grey studio background. Retouch4me Clean Backdrop plugin
How to use Retouch4me Clean Backdrop?
To use Retouch4me Clean Backdrop, apply the filter to studio photos to automatically remove dirt, sensor dust, and folds from the background. This plugin identifies the subject and cleans the surrounding area without affecting shadows or lighting, saving photographers hours of manual cloning and healing work.
- Import Photo: Open your studio or product shot in Photoshop.
- Select Filter: Go to Filter > Retouch4me > Clean Backdrop.
- Choose Dirt Mode: Select from Fine, Medium, or Coarse Dirt depending on the background mess.
- Protect Subject: Use the auto-masking feature to ensure the AI doesn’t retouch the person or product.
- Process: Click Apply to wipe the background clean instantly.
From a 2026 Photography Forum: “I stopped using ‘Beauty Mode’ on my phone because it was making me look like a 2D drawing. Switched to Retouch4me Heal. My pores are back, but my acne isn’t. It’s the only way to stay ‘authentic’ on social media now.”
Reddit r/Photography (Jan 2026): “If you’re doing corporate headshots, don’t even think about using free apps. One client complained that they didn’t look like themselves because the AI smoothed out their ‘character lines.’ Retouch4me is the only one that keeps the human look.”
What the Internet is Saying (Real Conversations)
I didn’t just trust my own eyes. I dug into the Reddit threads and photography forums to see if regular people actually like this.
“I used to spend 30 minutes on Frequency Separation for every wedding photo. Retouch4me Heal does it in one click. It pays for itself in one job.” — u/WeddingPro2026 via Reddit
“The Dodge & Burn plugin is black magic. Photoshop’s neural filters look like trash compared to this because they kill the texture. This keeps the grain.” — Verified User via Fstoppers
The Common Complaint: “It’s expensive.” My Take: Yes, it is. But unlike Adobe, it’s a One-Time Purchase. You buy it, you own it. No monthly subscription draining your bank account forever.
How to Use It (My 30-Second Workflow)
You don’t need to be a tech wizard. Here is how I use it for my blog posts:
- Open Photoshop (or use it as a standalone app if you don’t have PS).
- Load your image.
- Run “Retouch4me Heal”: I set the sensitivity to roughly 85%.
- Run “Retouch4me Dodge & Burn”: I keep this at 100% and then lower the opacity if it’s too strong.
- Export.
That’s it. What used to take me an hour now takes under a minute.
Final Verdict: Is it Worth the Price Tag?
If you are just posting memes, no. Use a free app.
But if you are a creator, a professional, or someone trying to build a personal brand in 2026, bad photos are costing you money. You cannot look unprofessional.
Retouch4me is the only tool I’ve found that respects the human face. It lets you be you—just on your best day, with perfect lighting, and zero sleep deprivation.
[Get the Portrait Essentials Bundle Here] (I recommend starting with the “Heal” + “Dodge & Burn” combo—it’s the best value for money).
FAQ Snippet:
Is this the best AI plugin for Photoshop 2026 for portrait photographers?
Absolutely. While many competitors exist, our Retouch4me review confirms it is the most stable and professional best AI plugin for Photoshop 2026. Unlike other tools that feel like toys, this suite integrates directly into your professional workflow, allowing for batch processing that saves hours of manual labor.
How does the AI skin retouching no blur technology actually work?
Most apps simply blur the skin, which looks fake. This software uses “Frequency Separation” via neural networks. This allows for AI skin retouching no blur, meaning it only targets the “color” layer to fix redness while leaving the “texture” layer untouched. Your pores stay visible, but the skin looks perfect.
Can I use this software to remove stray hairs AI automatically?
Yes. One of the biggest pain points for creators is messy hair. You can remove stray hairs AI using the specific “Heal” and “Fabric” plugins which detect flyaways against the background and remove them without making the head look cropped or artificial.
What is the best way to fix skin texture photos without losing detail?
To fix skin texture photos properly, you need a tool that recognizes the difference between a blemish and a natural skin feature like a mole or freckle. Retouch4me’s Heal plugin is designed specifically for this, identifying temporary imperfections while preserving your unique skin identity.
How does a Retouch4me review compare to Photoshop’s native Neural Filters?
Photoshop’s internal filters are a great start, but they often struggle with high-resolution details. Our Retouch4me review shows that these plugins are more precise, specifically for professional printing. While Photoshop might “hallucinate” new skin, Retouch4me simply cleans what is already there.
Does the software support AI skin retouching no blur for dark skin tones?
Yes. A common failure in AI is ashy-looking results on darker skin. Because this tool focuses on AI skin retouching no blur by separating frequency, it respects the natural highlights and oil-levels of all skin tones without changing the person’s actual complexion.
Can I fix skin texture photos in batch for an entire photoshoot?
This is the “Secret Weapon” for pros. You can fix skin texture photos for 100+ images at once by using the standalone app or the Photoshop “Actions” feature. It applies the same professional level of retouching to the whole set in minutes.
Is there a tool to remove stray hairs AI from clothing as well?
The “Fabric” plugin is specifically designed to remove stray hairs AI, lint, and even wrinkles from clothing. This is essential for E-commerce or fashion bloggers who need their outfits to look “catalog-ready” without spending a day with a clone stamp.
Why is this considered the best AI plugin for Photoshop 2026 for beginners?
It’s the best AI plugin for Photoshop 2026 because it has a “zero learning curve.” You don’t need to know how to use masks or layers; the AI creates the layers for you. You just click “Run” and adjust the opacity of the result.
What is the final verdict of your Retouch4me review for 2026?
Our final Retouch4me review is that this is a “must-own” for anyone serious about their image. It is the only software that successfully bridges the gap between “Fast AI” and “Professional Quality.”
Is Retouch4me better than Photoshop Neural Filters?
Yes. Neural filters are faster but messier—they often blur hair or glasses. Retouch4me is precise. It respects boundaries and, most importantly, preserves skin texture.
Does it work on dark skin tones?
Absolutely. Because it works on “Frequency Separation” rather than just color masking, it is incredibly accurate for melanin-rich skin, preserving the natural glow without making it look ashy.
Can I use it for video?
Yes! They recently launched Retouch4me Color Match and Heal for DaVinci Resolve. It’s heavy on the GPU, but it lets you retouch moving video skin automatically.
Can Retouch4me work without an internet connection?
Yes. This is a massive win for privacy. Unlike most “Magic Editors,” Retouch4me processes everything locally on your GPU. If you are a high-profile creator or working on sensitive client photos, your data stays in your house.
How to remove stray hairs AI without making the head look cropped?
Most free tools just “erase” the hair and the background together. Retouch4me’s Stray Hairs plugin is built to remove stray hairs AI by identifying the thin lines of hair and filling the background texture behind them perfectly. It looks like you spent hours with a clone stamp.
Is Retouch4me better than Photoshop’s 2026 Generative Fill?
You need a decent GPU (6GB+ RAM) and Windows 10/11 or macOS 10.14+. Because it’s “On-Device AI,” it uses your computer’s power to ensure AI skin retouching no blur is processed in seconds rather than minutes.
How do I automate skin retouching for a whole photoshoot?
You use the Retouch4me Panel or Arams. You can select 500 wedding photos, hit “Run,” and the AI will fix skin texture photos, clean the backdrop, and brighten the eyes for the entire set while you do other work.


![Dynamic infographic showing 5 Terrifying Facts: Why did the Ohio meteor cause a sonic boom? [Exclusive 2026 Science]. It depicts a powerful daylight fireball explosion over Medina County, Ohio, with concentric blue and orange shockwaves rippling down over a suburban neighborhood, causing windows to rattle.](https://mithvibe.com/wp-content/webp-express/webp-images/uploads/2026/03/Why-Did-The-Ohio-Meteor-Cause-A-Sonic-Boom-Exclusive-2026-Science-MithVibe-150x150.png.webp)

